There are a number of helpful and useful things to be learned when starting to play Duskers. This simple guide is designed to get you up and running as quickly as possible. It is recommended for new players to play the tutorial, and much of the following information can be found within it.
The first steps[]
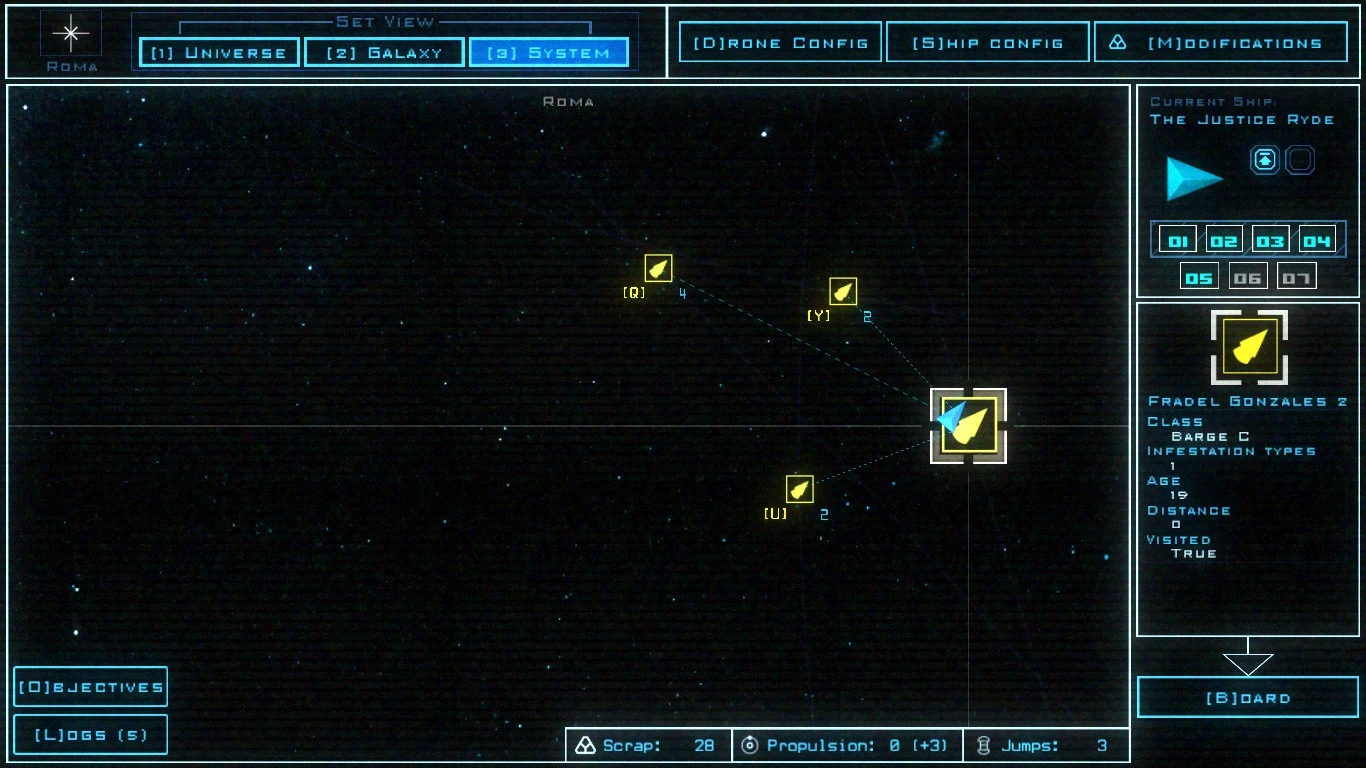
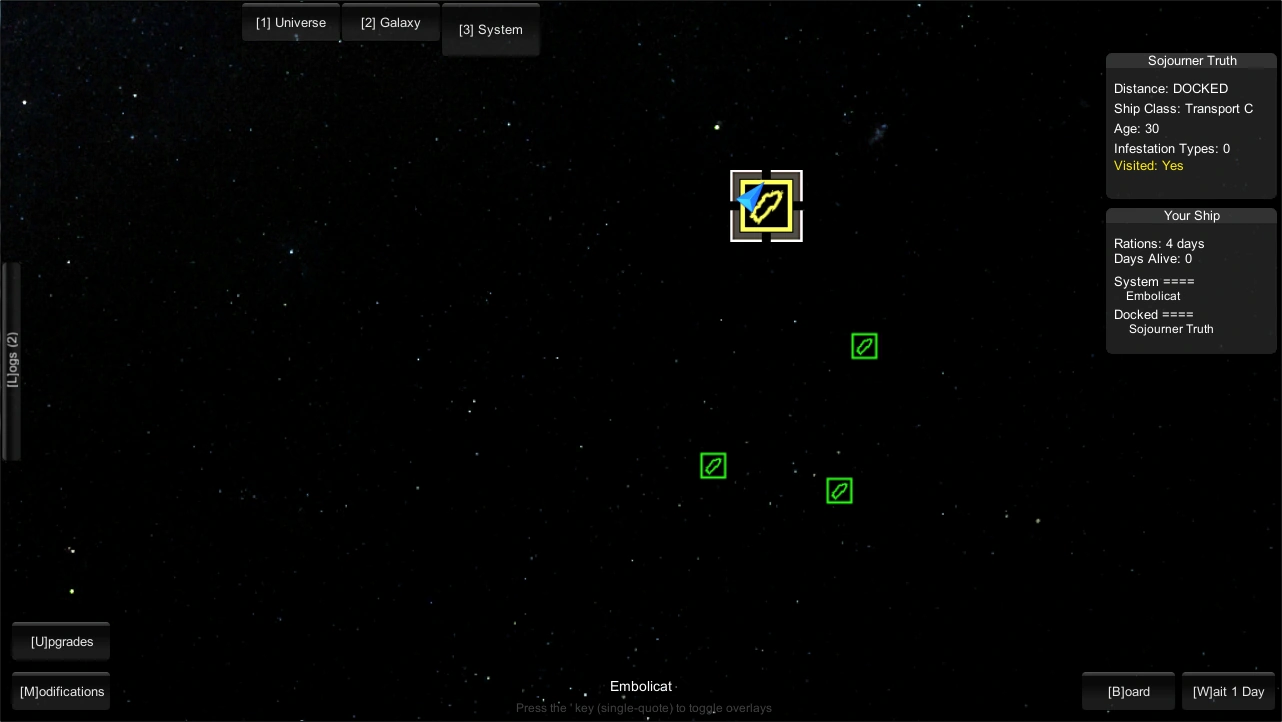
When you first start a new game, you are presented with the navigation view.
On the right side of the screen you can see your current ship and the ship or station that you are located at, as well as information about that ship.
To the left you will see several other symbols. Each of these represent another ship that you can travel to and, if you so choose, board. They can be selected by pressing the keyboard button below them or with the arrow keys.
Below the map you can see your current scrap, propulsion fuel, and jump fuel.
Propulsion Fuel indicates how far your ship can travel in the current system, with the left most number being the standard tank which will refill to 6 when jumping between systems and the reserve tank being the next number indicated by a + (eg. +3). The ship will first use the fuel in the standard tank when traveling to locations using T and more fuel can be used from the reserve tank if the player wishes to keep travelling after the standard tank empties. You will likely not have enough fuel to visit all of the locations in one system so plan accordingly according to the types of ships in the system.
Jump Cores Indicate how many times you can jump to a new system within the current galaxy. Jumping recharges the standard propulsion fuel tanks back to 6 but does not affect the reserve tank.
With the 1, 2, and 3 keys you can switch between Universe, Galaxy, and System view. The Universe tab is only relevant when using the stargates you can find and allows you to travel between galaxies. The Galaxy tab shows systems and a circle around your ship that shows the range of your scanners. The System tab has green spots on the map that represent derelict ships that can and for the most part should be scavenged to find fuel, drones, drone upgrades and ship upgrades. There will also be a blue ship, which represents your own. You can fly to derelict ships by selecting them and pressing Enter. If your ship is already next to your selected derelict ship, you will board instead (This can also be done through pressing B). If you clear out the entire ship, you can commandeer it. Commandeer allows you to take a derelict ship, replacing your current one. You will gain any upgrades installed on that ship and you will inherit the derelict ship's scrap capacity.
Before boarding[]
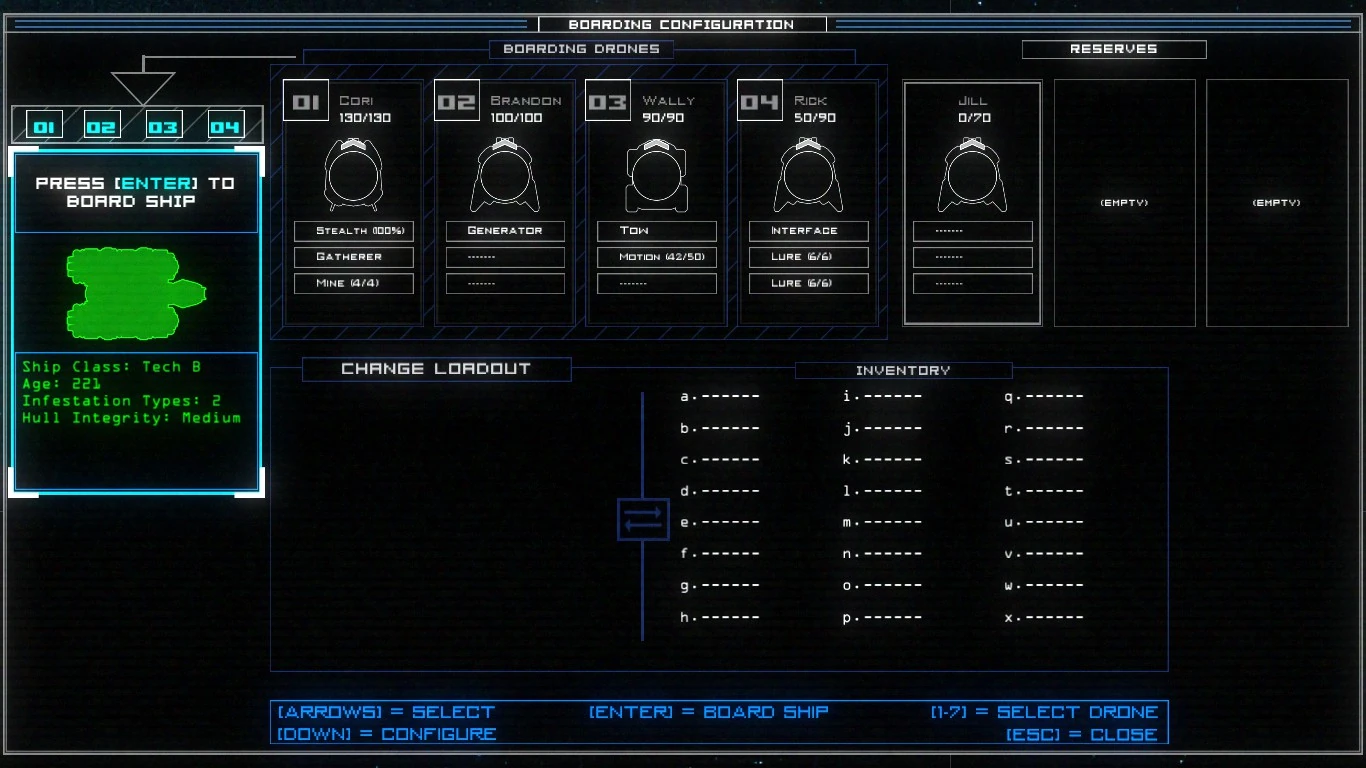
The boarding configuration screen has your current drones on top. You start with 3 drones and 4 to 5 upgrades. The first drone starts with 2 to 3 upgrades that are randomly generated. The second drone starts with the Generator upgrade and the third drone starts with the Tow upgrade.
Starting scavenging[]
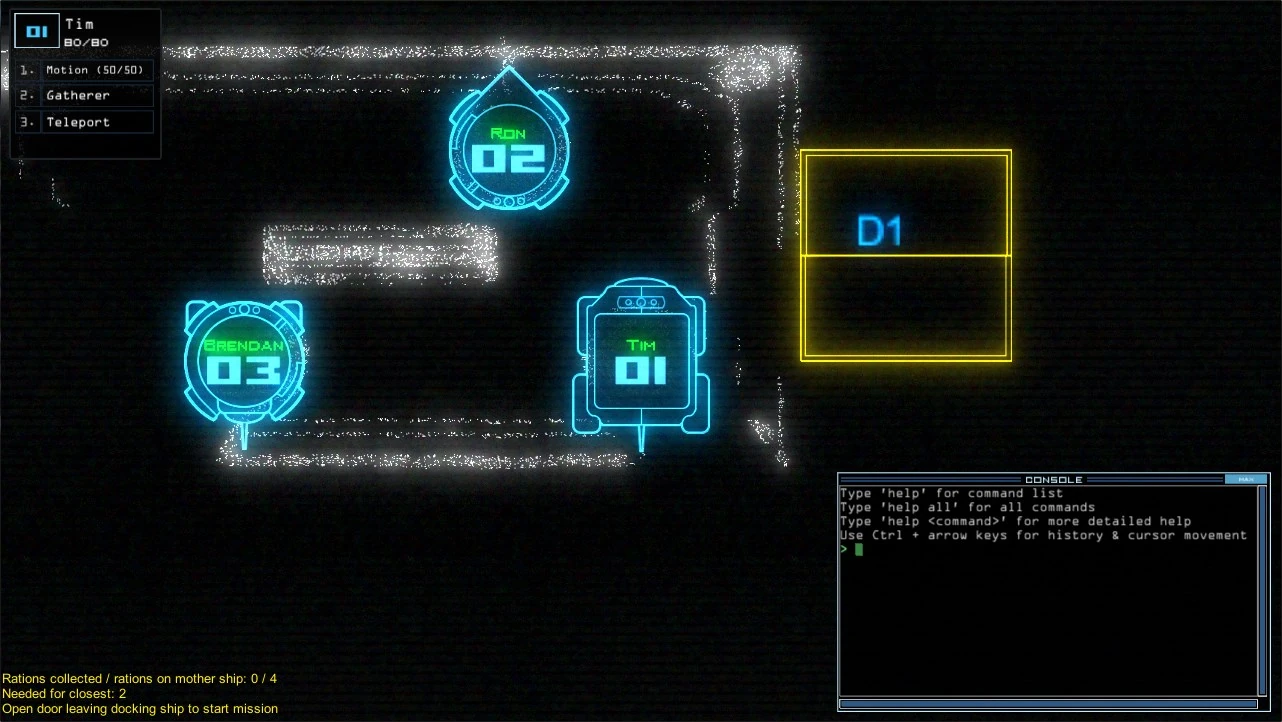
You will start with the 3 drones in the docking ship. To one of your sides you can see an airlock with the text "A1" on it. Since the first room is always safe, you can just open the door with open a1 or just a1 for short. Inside you will often find a hexagon with an orange lightning icon on it which represents a power inlet. Select drone 2 by pressing 2 on the keyboard, drive it up to the power inlet and type generator into the console. It will drive to the power inlet and the inlet should change from yellow to green. Press SPACE to go to the schematic view, where you can see green doors that are now operational because of the power inlet. If drone 1 has the Motion upgrade, you can position the drone in a room and execute the "motion" command, which will sometimes show you in the schematic view if an adjacent room contains an enemy or not.
You may want to try using the command begin after first docking. This will navigate drone 1 and drone 2 into the adjacent room (which is always safe at first) and send drone 2 to activate the power inlet with generator.
Collecting[]

When exploring the rooms, you can come across 3 scavengables like the ones to the right. The yellow chamfered triangle is a piece of scrap. It is needed to repair drones and drone upgrades, and to purchase more upgrades from autotraders. The White/Blue square is a ship upgrade. They can be found in normal, fixed or destroyed state. The normal state can be towed back to the docking ship using drone 3 with the tow command and later installed on your own ship. The fixed version works fine, but can't be towed away, so the only way to use it is to commandeer the ship. The destroyed version can't be towed because it is broken in pieces. The non-glowing (brown) drone with an X marking it is a destroyed version of a drone, it cannot be Towed but its modules can be swapped using the swap command. The disabled version has a yellow outline and can be towed back to the docking ship to be recovered. When you have recovered everything you think you can, you can navigate all drones back to the docking ship by typing navigate 1 2 3 4 r1 or by using the end command (which is a default alias) and when all drones are in the docking ship, execute exit.
Beware that any drones or towed objects not in the docking ship (r1) will be irreversibly left behind when using exit.
Flying on[]
When you have returned from the derelict ship, you have probably obtained some fuel so you can explore some more derelict ships. Select another of the green ships and repeat.
A FOREWARNING:[]
Past the first ship you dock, there will be enemies (if there is > 0 infestations). It is HIGHLY RECOMMENDED to not stick to the overlay/ship scheme the whole game and go into drone feed frequently as this will allows you (on some drones) to hear audio cues to various dangers and tells. In fact it is possible to roughly assess certain threats by their audio cues and judge their distance from you.
Below are some general tips for you:
- Just because you have a gun doesn't mean you're untouchable.
- Get into the habit of making aliases, it'll turn a terrible situation into a manageable one.
- CLOSE THEM DOORS.
- OPEN THE AIRLOCK. (after asking yourself at least three times whether it's a good idea, also make sure your drones aren't inside a room with the airlock if you decide you want to open it, if your drone is inside, bye bye frank!)
- Board a derelict with at least some target in mind such as more fuel or scrap. So when you get it you can better judge if it's okay to just straight up leave.
- There are ways outside killing to get what you want.
- Switch from drone to overlay scheme frequently, they both tell signs you won't see in the other one.
- Sometimes it's better to just do a full RESET.
- Plan for failure as it will come inevitably.
- It's much more educative to play outside your comfort zone. The game forces you to anyways but actively doing it helps.
- You don't have to visit EVERY ship on each system. Prioritize based on your situation.